Don’t Know How to Reduce the Video Size?
Use Movavi Video Converter!
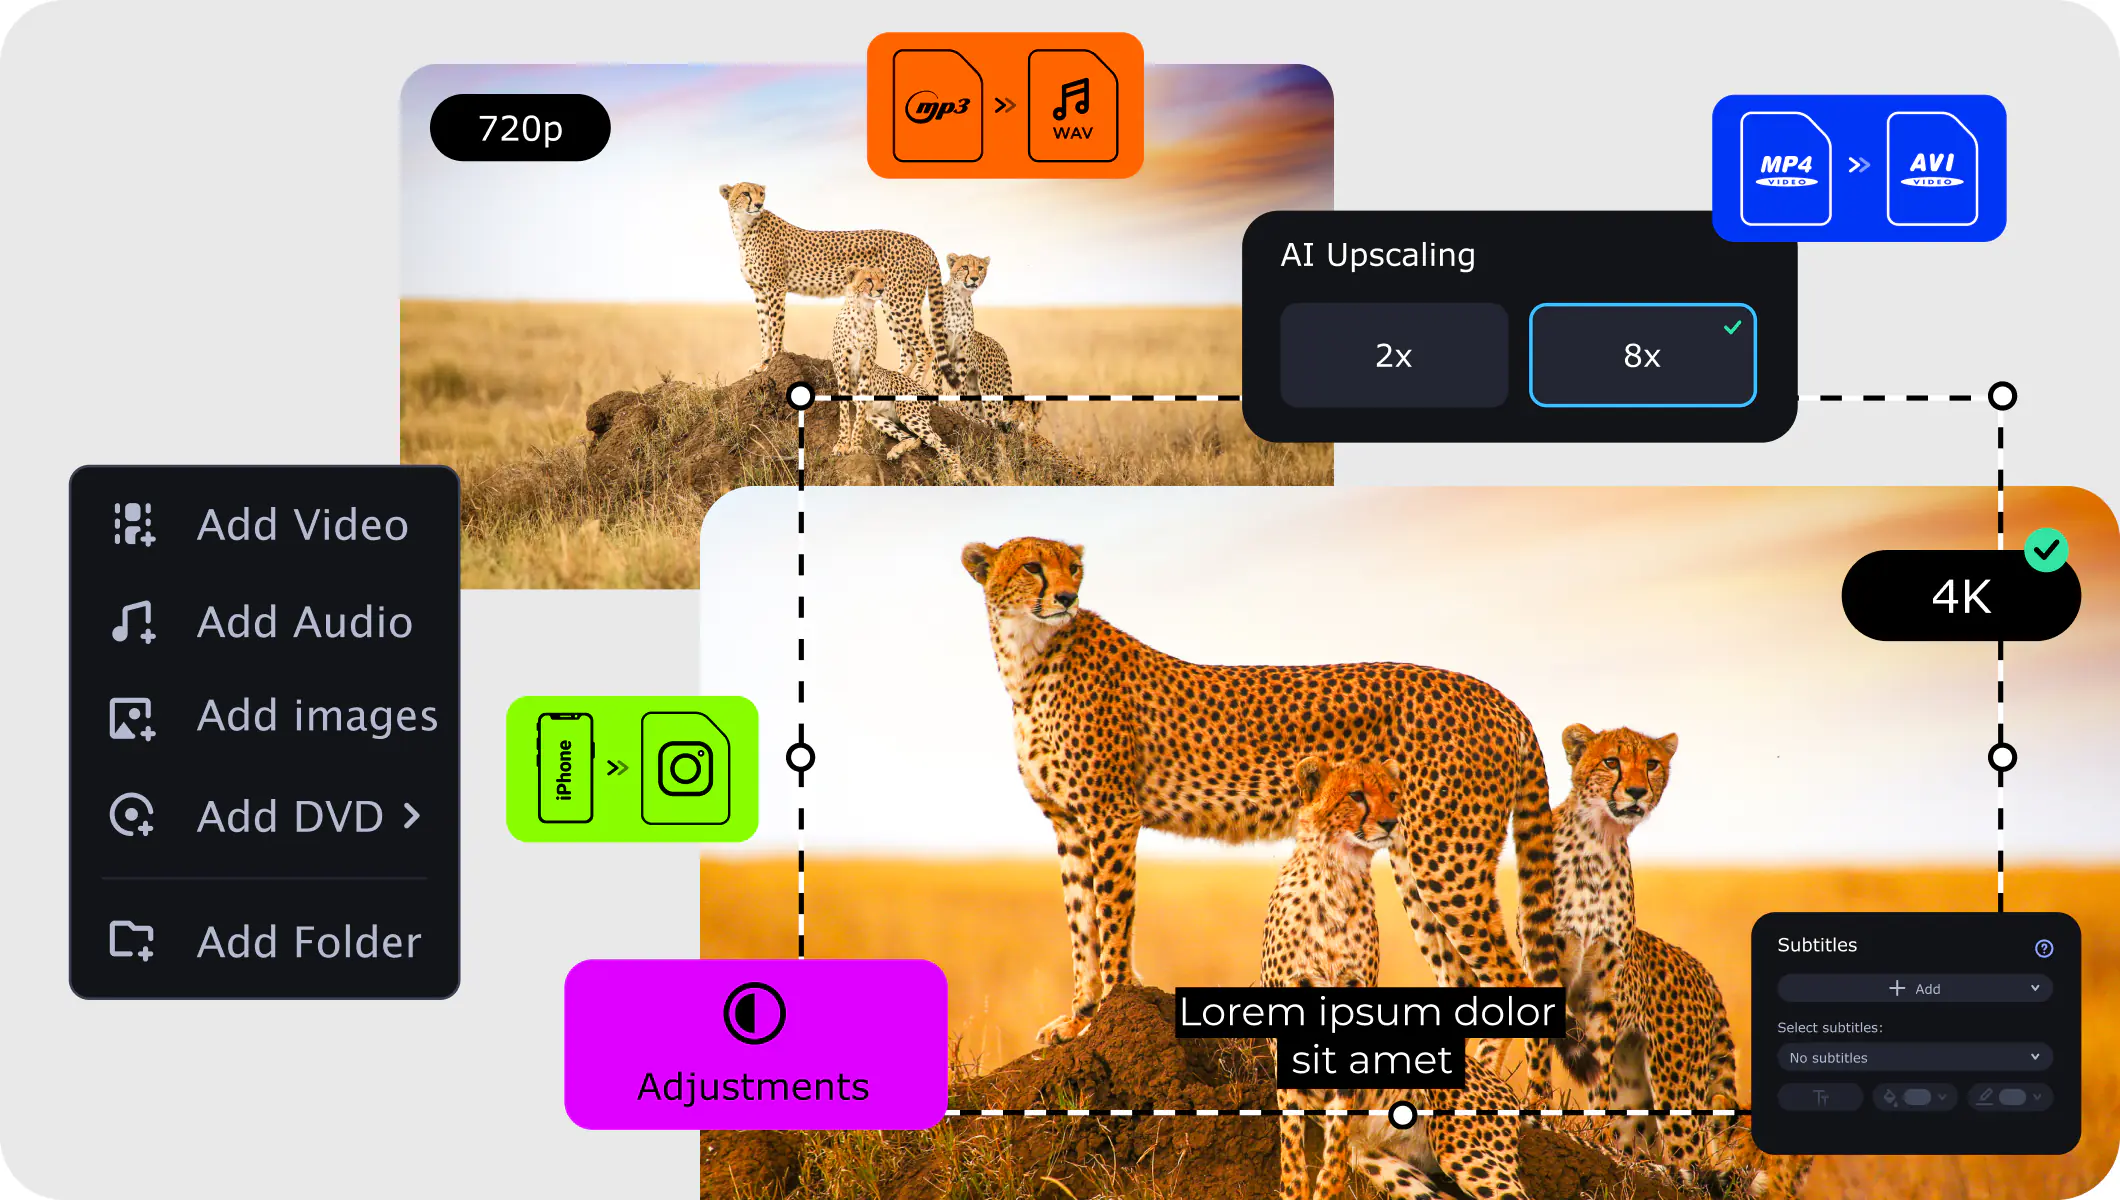
- Lightning-fast conversion
- Batch processing of files – any number, any size
- No quality loss, even with 4K videos
- Easy editing and compression
How to reduce the video file size
As recently as ten years ago, computer hard drives had a capacity of 20 GB or even less. Now, hard drives can hold several terabytes of data. But the amount of data we store on our computers is also increasing all the time. For example, many movies today are available in high quality and Full HD resolution. These videos take up a lot of hard drive space, and if you want to store your video collection on your PC or Mac, even if you have a big hard drive, you really need to downsize your videos. And if you want to watch your favorite movies on a tablet or smartphone, video size reduction is absolutely essential.
Here are a few issues a conversion app can help you deal with.
You do distance working
When you work from home, a large part of your communication is built around video instructions. To make it flow more smoothly, you can reduce the size of large video files.
Videos take too much space
Your device may run low on free space if your movie collection is big enough. Try to compress the larger videos so that more of them would fit on your hard drive.
Videos upload too slowly
You might want to speed up the process of sending bulky videos via Internet-based services. Just reduce the size of the videos using this handy application.
Reducing the size of video files with Movavi Video Converter lets you save them in any popular format: AVI, MP4, MKV, MOV, WMV, and more. You can choose one of the ready-made presets for iPad, iPod, iPhone, Sony PlayStation, Xbox, Android phones, and other devices. Thanks to the intuitive user interface, working with Movavi Video Converter is really easy even if you’re new to video processing. Download now and see for yourself!
Follow the simple instructions below to be able to decrease the video size in 5 easy steps.
Step 1. Install Movavi Video Converter on your computer
As soon as you launch the downloaded file, the installation window will open. Follow the on-screen instructions to install the software on your PC or Mac.
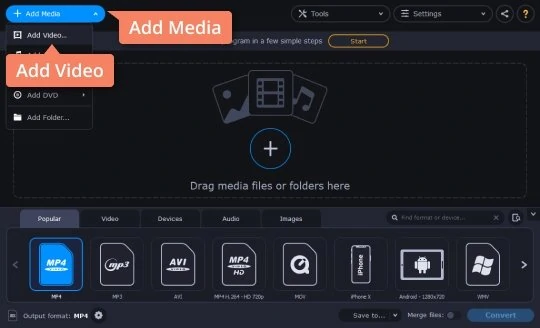
Step 2. Add video file(s) to the program
Click the Add Media button and then Add Video in the upper left corner of the program interface to open the Open File dialog box. Choose one or more video files and click Open.
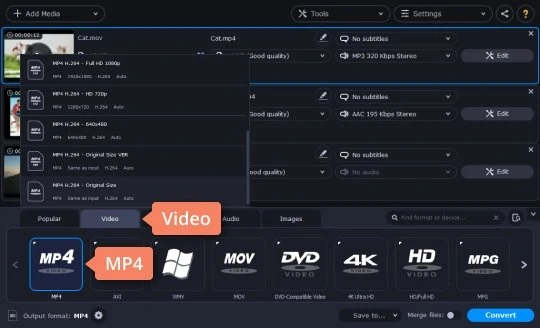
Step 3. Choose your preset and specify video settings
Click the Video tab, then choose your desired video format from the list. It’s probably best to choose one of the more popular video formats, such as MP4 since this is widely supported on both computers and mobile devices. If you want to change the video parameters as well as the format, click the Cogwheel button below the ribbon of presets and specify the desired settings: video and audio codecs, resolution, aspect ratio, frame rate, etc. If you need to really minimize the video size, use one of the latest video codecs like H.264 since these provide higher video quality for smaller file sizes.
If you want the output video to play on a mobile device, select the Devices tab, find your device on the list, and choose the appropriate preset. The converted video will be assigned the optimal parameters for viewing on that device.
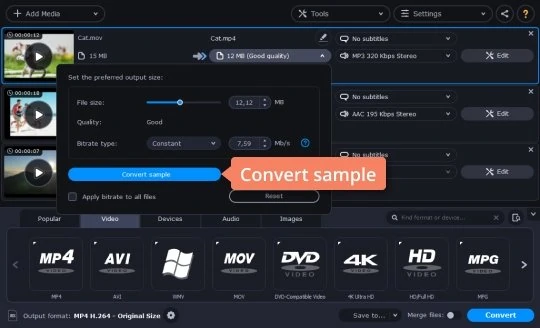
Step 4. Set the size and quality for the output video file
The size and quality of the output video are determined by the bitrate value: the higher the bitrate, the better the quality and the larger the video file size. If you want to reduce the movie file size, you need to decrease the bitrate. Click the estimated size value of the output video in the file information to open the size adjustment window. Drag the File size slider to the desired output file size. Click Convert sample to quickly check the quality of your file after conversion.
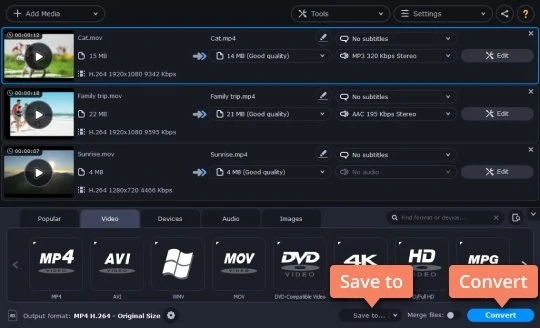
Step 5. Choose the output folder and start the conversion
By default, all converted files are saved to the Movavi Library folder on your hard drive. If you want to specify another folder, click the Save to button, create a new folder or choose an existing one, and click OK.
To start the video conversion process, click the Convert button in the lower right corner of the program window. After the conversion is complete, the folder containing the converted video will open automatically (unless you disable this option in the program settings).
Now you know how to reduce the size of video files so that they take up less space on your computer or mobile device. With Movavi Video Converter, you can not only change a video format and shrink file size but also complete many other tasks. For example, you can use the program for reducing video resolution. To learn more about working with Movavi Video Converter, check the complete list of guides about video processing.
Movavi Video Converter
The ideal way to get your media in the format you need!

Have questions?
If you can’t find the answer to your question, please feel free to contact our Support Team.
Join for how-to guides, speсial offers, and app tips!
1.5М+ users already subscribed to our newsletter